How to Use and Maintain Your Jack to Make It Last Longer
Your floor jack is one of the most expensive and most safety critical tools in your garage. A well maintained jack lifts thousands of pounds without warning signs of failure for over a decade, while a neglected one starts leaking fluid, losing pressure, or worse, dropping a vehicle on top of you.
The good news is that floor jacks are simple machines. With a few minutes of care every few months and the right habits when you use one, you can stretch the life of a quality jack from 5 years to 20 years or more. This guide walks you through the right way to use your floor jack, the most common mistakes that destroy them, and the maintenance routine that keeps yours working like new.
This post contains affiliate links. We earn a commission when you purchase through our links at no extra cost to you. We only recommend products we’ve personally tested and use ourselves.
Understanding Your Floor Jack
Before you can maintain your jack, you should know how it works. A hydraulic floor jack uses a simple pump to push oil from a reservoir into a cylinder. When you push the handle down, oil moves into the lift cylinder and forces the saddle up. When you turn the release valve, oil returns to the reservoir and the saddle drops.
The main parts you need to know are the lift arm, the saddle, the pump piston, the release valve, the reservoir, and the wheels. Inside the body sit rubber seals, check valves, and a small overload bypass valve. These components fail in predictable ways once contaminated oil, air, or rust find their way inside. Knowing what each part does helps you spot trouble before it becomes a safety risk.
How to Use a Floor Jack Safely
Before you lift anything, park the vehicle on level concrete or asphalt. Soft ground, gravel, or sloped driveways are not safe surfaces for jacking. Set the parking brake, leave the transmission in park or in gear, and chock the wheels on the opposite end from where you are lifting.
Find the manufacturer recommended jack points for your vehicle. These spots are listed in your owner manual and usually marked on the frame with small notches or arrows. Lifting on unprotected sheet metal or random frame spots will dent your body panels or crack structural welds.
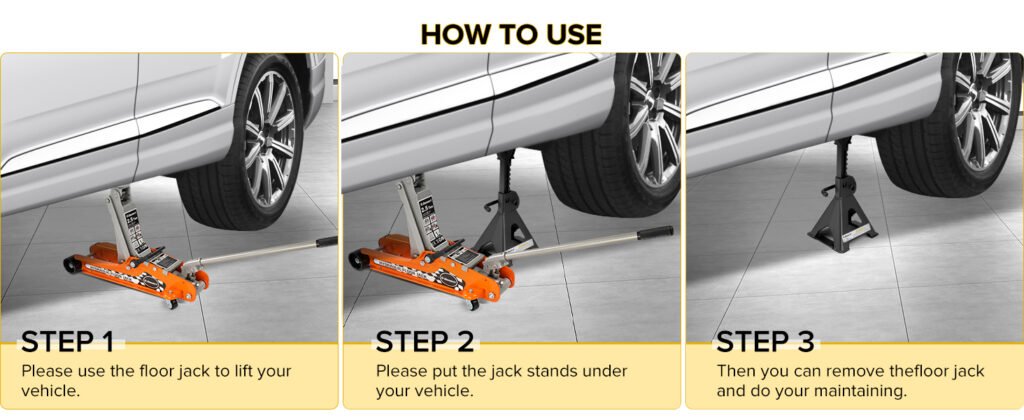
Roll the jack into position and turn the release valve clockwise until it is fully closed. Place the saddle directly under the jack point with the rubber pad making full contact. Pump the handle slowly and watch the load as it rises. A jerky or fast pump can shift the load off the saddle.
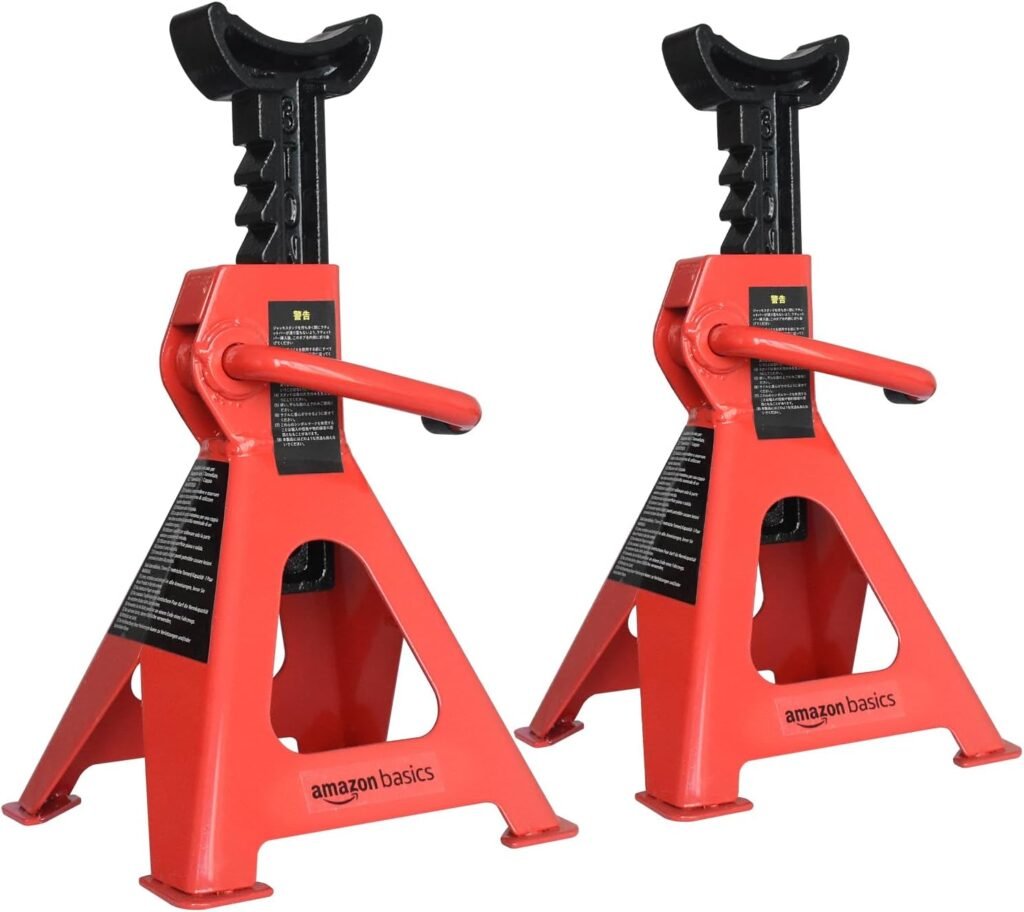
Once the vehicle is at working height, slide a pair of heavy duty jack stands into position under the frame and lower the vehicle slowly onto the stands. Never crawl under a vehicle held by the jack alone. A jack is a lifting tool, not a holding tool. After the stands take the weight, give the vehicle a firm shove to test stability before you slide underneath.
When lowering, turn the release valve slowly. A fast release sends the load down hard and stresses the seals.
Common Mistakes That Shorten Jack Life
Several habits destroy floor jacks faster than anything else. The first is overloading. A 2 ton jack lifted to its rated capacity already runs near its limit. Trying to lift a 3 ton SUV with it bends the lift arm and blows the seals.
The second is using the wrong oil. Many users top up their jacks with motor oil, brake fluid, or transmission fluid. Hydraulic jack oil is a specific viscosity, and the wrong fluid eats the seals from the inside.
Other costly mistakes include lifting on a sloped surface, leaving the jack fully extended for days at a time, leaving water on the jack body until rust eats the chrome plating, and using the handle as a pry bar. Each of these shaves years off the life of an otherwise solid tool.
Routine Maintenance Steps
A good maintenance routine takes about 15 minutes every three months. Start by wiping the entire jack body with a clean cloth to remove dust, brake fluid, and oil splatter. Pay attention to the wheels, the saddle, and the pump cylinder shaft.
Check the hydraulic oil level. With the saddle fully lowered, remove the fill plug and look inside. The oil should sit about a quarter inch below the fill hole. Top off with proper hydraulic jack oil if the level is low. Never use motor oil or brake fluid as a substitute.
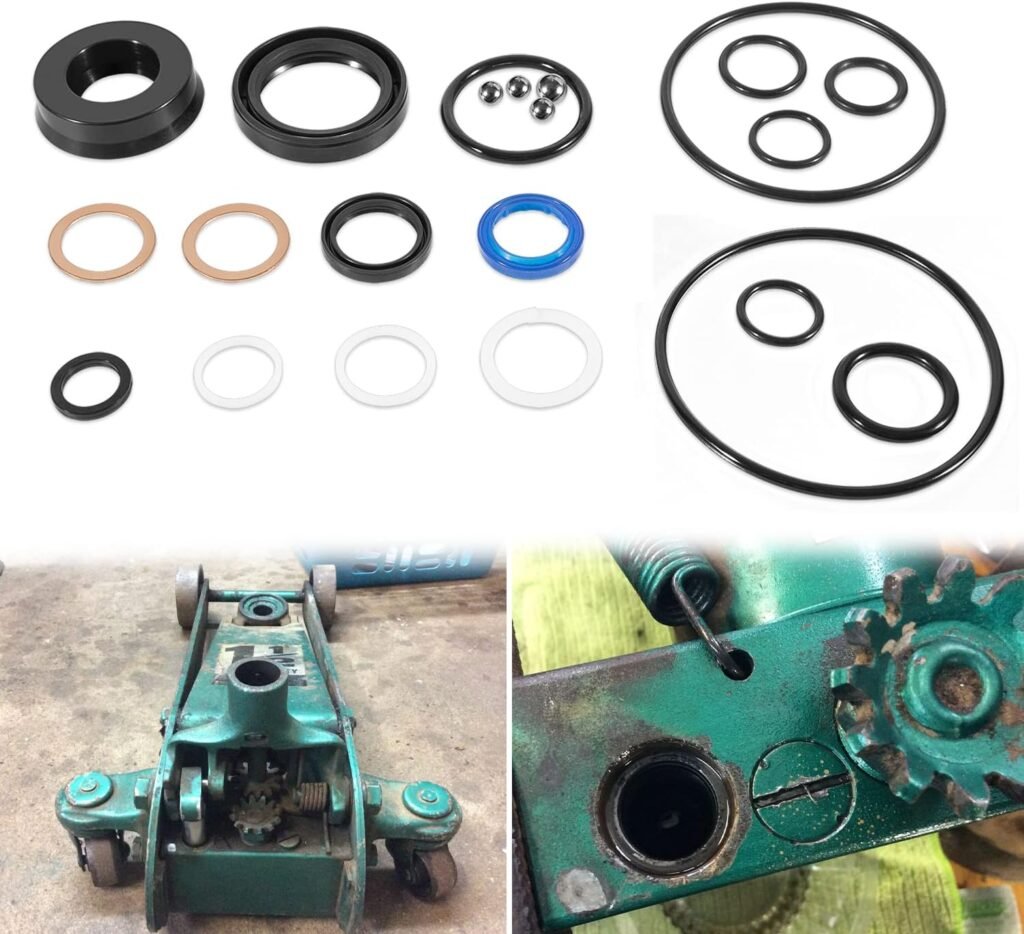
Inspect the rubber seals around the pump piston and lift cylinder. Black, gritty residue around the seal area is a warning sign of internal wear. If you see steady fluid weeping past a seal, the jack needs a rebuild kit before its next use.
Bleed any air trapped in the hydraulic system once a year. Open the release valve fully, pump the handle quickly about 10 to 15 times, then close the valve and test a normal lift. Trapped air causes spongy lifting and slow drops.
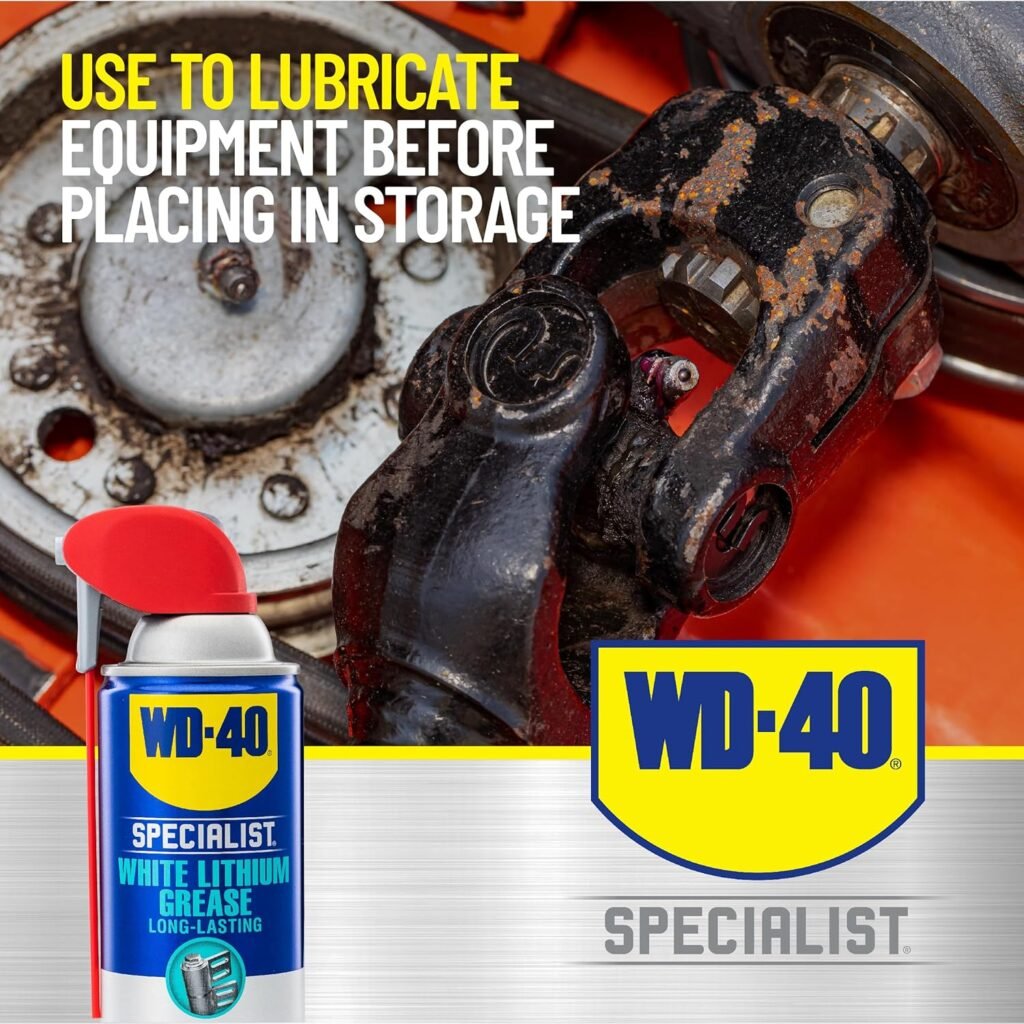
Grease the moving joints with a light coat of white lithium grease. The lift arm pivot, the saddle swivel, and the release valve stem all benefit from a fresh wipe of grease each season.
Lastly, check the wheels and casters. Hair, string, and dirt wrap around the axles and lock up the wheels. Cut them away and add a drop of light oil to each axle.
Troubleshooting Common Problems
If your jack will not lift at all, the release valve is probably not fully closed or air is trapped in the cylinder. Close the valve firmly and bleed the system as described above.
If the jack lifts but cannot hold a load, the internal seals are likely worn or contaminated. A floor jack rebuild kit from the manufacturer usually costs about a quarter of a new jack and takes an afternoon to install.
If the jack lifts only partway, the oil level is low or the bypass valve is sticking. Top up the oil first. If the problem persists, the bypass valve may need cleaning.
A slow leak around the cylinder shaft points to a tired wiper seal. Replace it before it lets dirt into the system. A jack that whines on lift usually needs a fresh pump piston seal.
Storage Tips
Always store your floor jack with the saddle fully lowered and the handle removed or stored vertically. This relieves pressure on the seals and prevents bent handle tubes. Keep it in a dry spot, ideally off bare concrete, since concrete wicks moisture into the wheels and steel body. A small piece of plywood under the jack does the trick.
Cover the jack with an old towel to keep dust off the cylinder shaft, and never store anything heavy on top of the lift arm.
Final Thoughts
A floor jack repays good care with decades of dependable service. The steps in this guide cost almost nothing and take less than an hour each year. Pair smart use with regular checks of the oil, seals, and wheels, and your jack will outlast the cars and trucks you bought it to service. Treat your jack like a safety tool first and a convenience tool second. Stay safe under every load, and consider it well done.
Also Read On:
10 Best Floor Jacks for Home Use and Mechanics in 2026
The 10 Best Hammers That Actually Work in 2026
Best Socket Sets for Mechanics: Top 10 Picks for Every Garage